AI IntelliTrack w/ Manual Tracking for Resolve Screen Replacements
DaVinci Resolve 20 Studio features an advanced machine-learning object-based AI tracker, known as IntelliTrack. It’s the default in DaFusion over the classic contrast-based point tracker because - well… it’s just terrific. But it doesn’t work quite like any point tracker you’ve used before. There is no defined search area with intellitrack. Instead, intellitrack looks at the entire frame to identify objects based on an image set that it was trained on, just like Magic Mask.
One of the reasons to choose the point tracker in DaVinci Resolve Fusion instead of the planar tracker for replacing a screen is the ability to manipulate the actual tracking data frame by frame. This is ideal for objects that move off-screen or when motion blur becomes an issue, because it can be corrected by simply clicking on the green displacement motion path.
The 4K Sony S-Log3 footage used in this free YouTube tutorial is available for download as part of the Cutting Club (the Creative Video Tips member page), which is a great way to support my efforts to teach you DaVinci Resolve.
Composition Settings
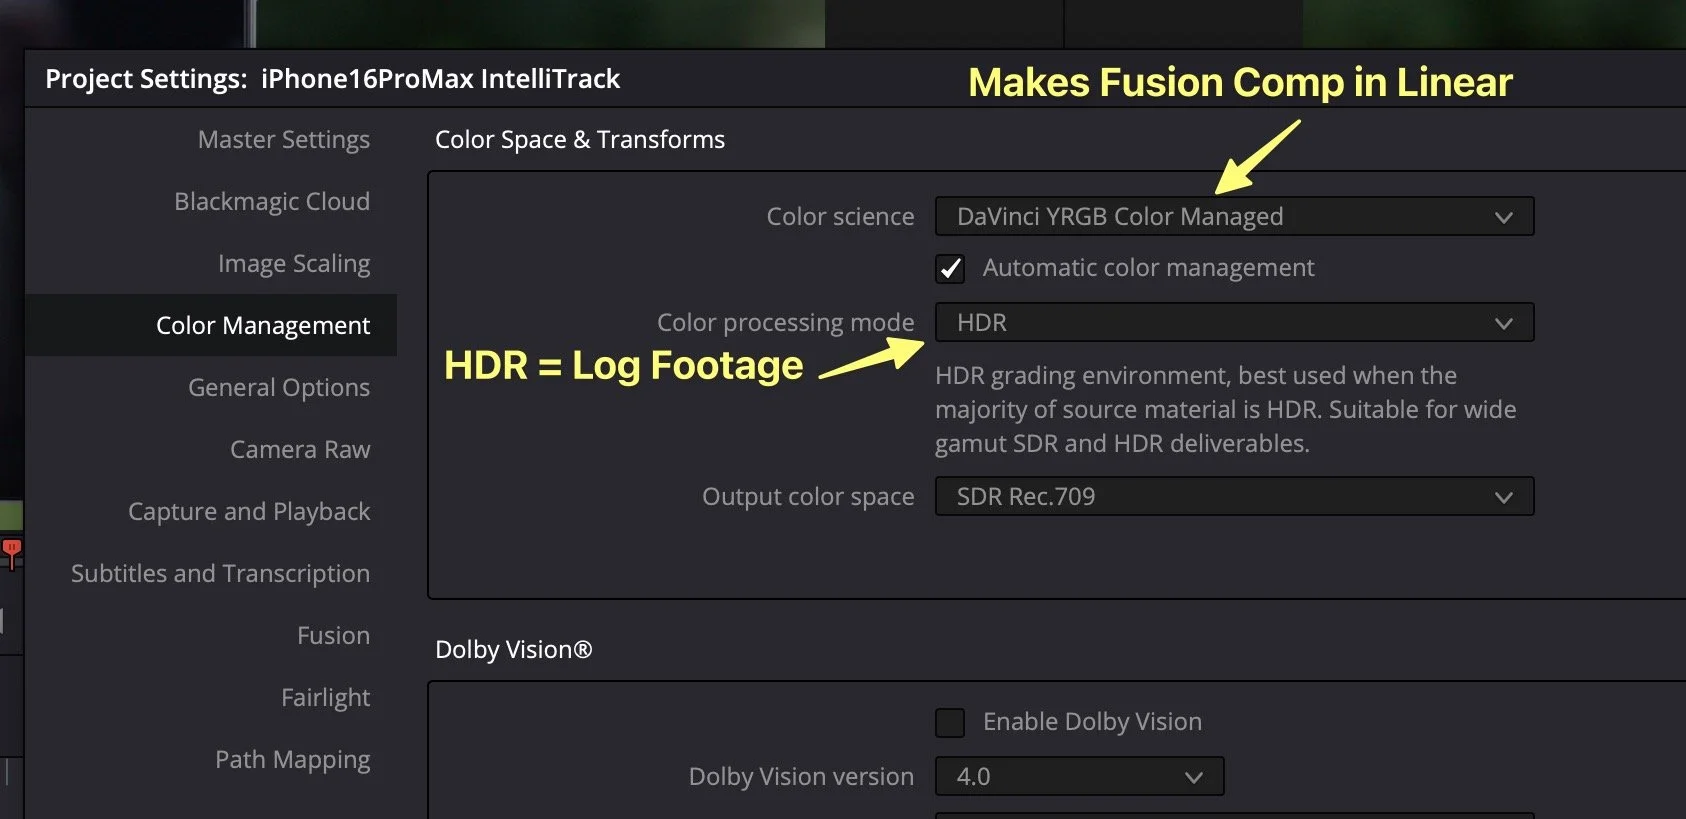
Project-wide color management is a wonderful thing in DaVinci Resolve because:
1 - It normalizes Log-encoded footage, without clamping any data.
2 - It automatically sets up all Fusion compositions to work in Linear - the “right’ way to comp, with an appropriate viewport LUT.
3 - It will also run faster on the computer versus using color space transform nodes on the color and fusion pages.
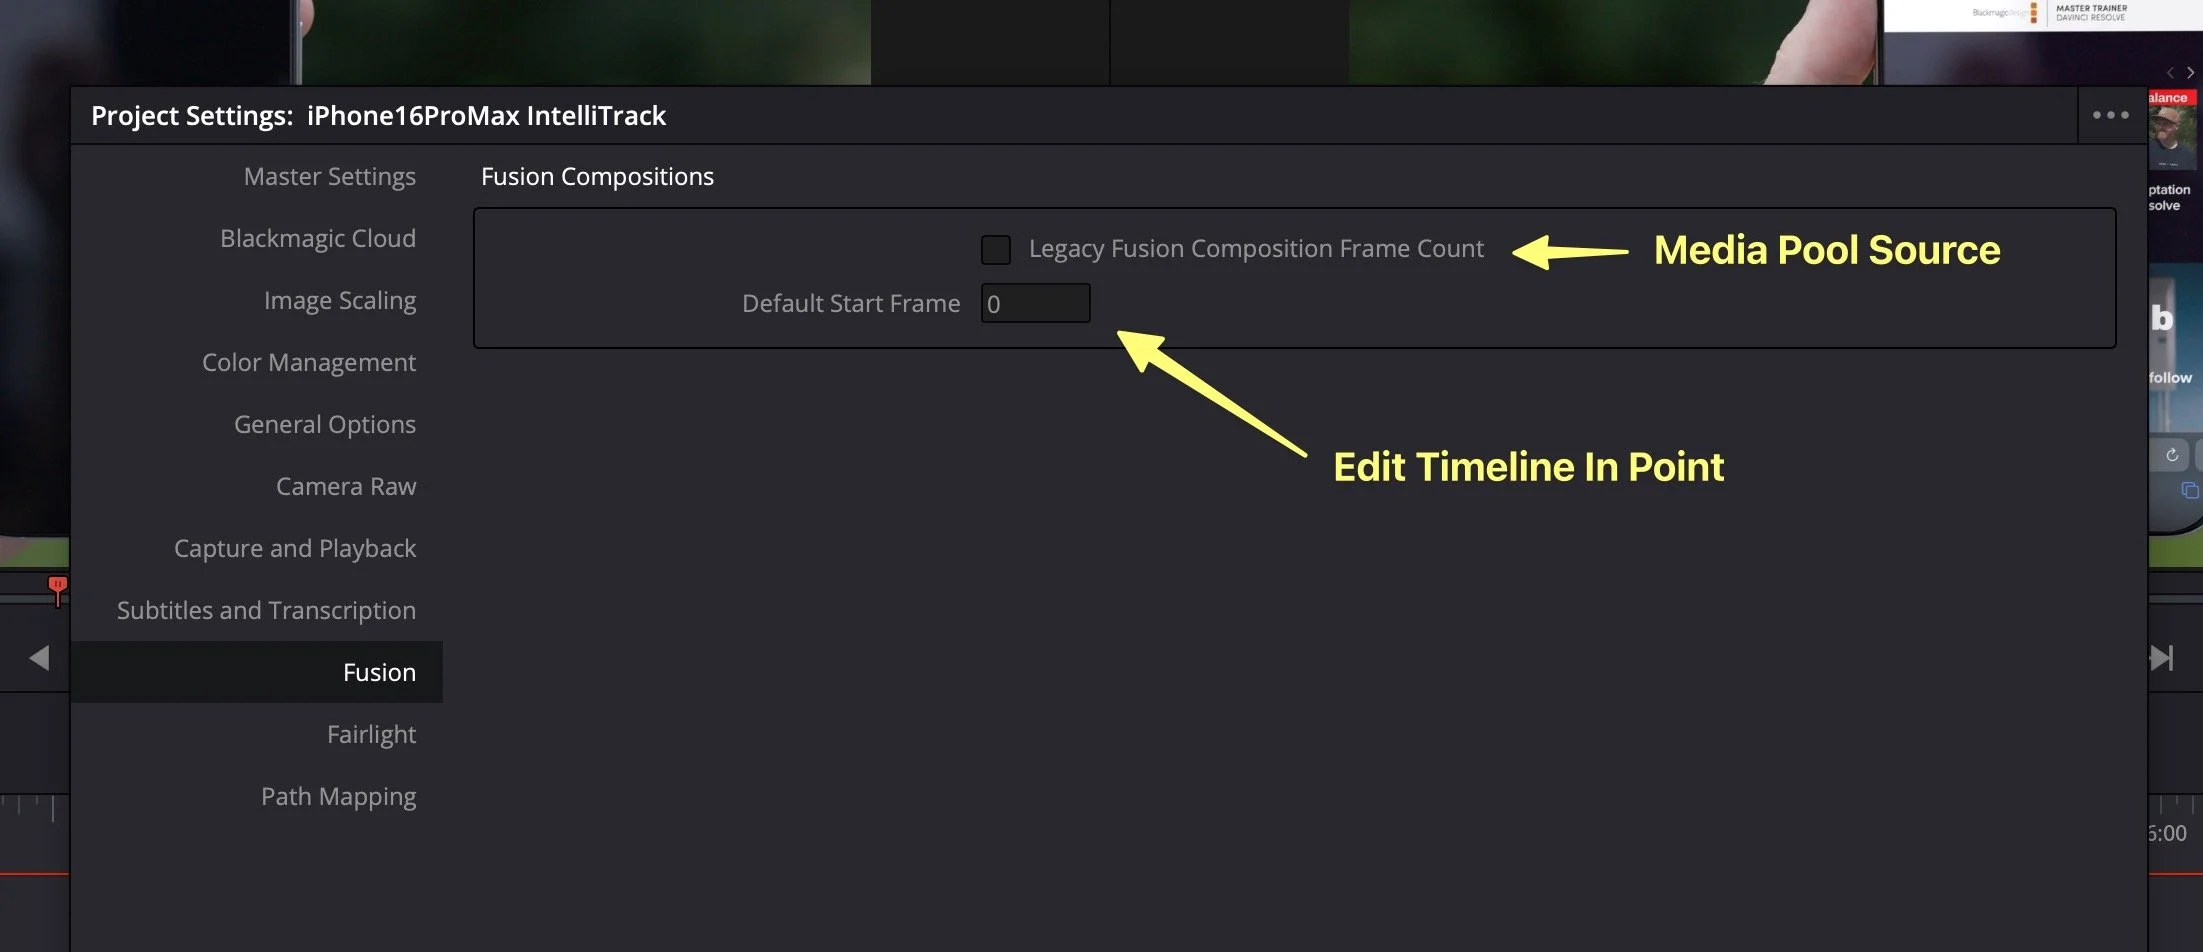
The other new project setting in DaVinci Resolve 20 is the Fusion default start frame. This is set to frame zero as the default, meaning that every brand-new Fusion composition started from the edit page timeline will start at frame 0 in Fusion. That means even after you trim the beginning of a clip, and the Media Pool source says the clip is on frame 834, Fusion says it's Frame 0 because of the edit point on the timeline. However, in the Media Pool in DaVinci Resolve, ALL CLIPS START AT FRAME 0. This includes clips brought directly into Fusion from the Media Pool for elements like MediaIn2, Media3 and anything new added to the comp.
AI Tracking
To corner pin using the AI-based IntelliTrack, connect a matching aspect ratio screen and insert it into the green foreground input of the Fusion tracker tool. The background, of course, is the main plate. The iPhone, in particular, has a 9:19.5 or 0.46 aspect ratio, so I used the 884x1920 pixels captured using the iOS screen capture to build a template checkerboard insert. This is my starting point for all phone screen replacements. Then, I swap out the insert as it becomes available, or once the tracking is all solidified.
Typically, we don’t track reflections, occlusions, specular highlights, or any overlapping foreground-background intersecting edges. But in my experience, the IntelliTrack does a great job with those overlapping edges. Perhaps this is related to the way it identifies the object? No clue, other than the fact that it’s been working very good for me. It’s also much less jittery than the older contrast-based point tracker.
With that in mind, I identify tiny contrast points on the corner edges of the phone to place four tracking match boxes in the corner positioner operation mode. After they’re aligned, I track forward, find when it fails, and delete the bad data.
At this stage, I also find it helpful to use the offset tool, clicking in the upper left corner of the viewer to drag my corners where they should be, rather than just at the tracking location. Finally, on screens with rounded corners, I’ll use a rectangle mask connected to the insert and use the corner rounding slider to evenly round those corners.
Manual Tracking
The key to manual tracking with the point tracker is to:
1 - Delete bad tracking data in the spline editor panel
2 - Move the match box crosshairs off of the green motion path. They’re no longer needed and just get in the way.
3 - Select the motion path you want to either modify or append with new keyframes. This is done by first clicking on any existing point until it turns red. If you need to add new keyframes, choose the click append mode in the tool bar, go to the frame you want to set a manual keyframe and click! After, you’re done in click append mode it’s best to go back to modify only mode.
4 - Enable motion blur in the settings tab of the tracker tool for tweaking final position using the modify only mode directly on the green tracker path.
Controlled Reflections
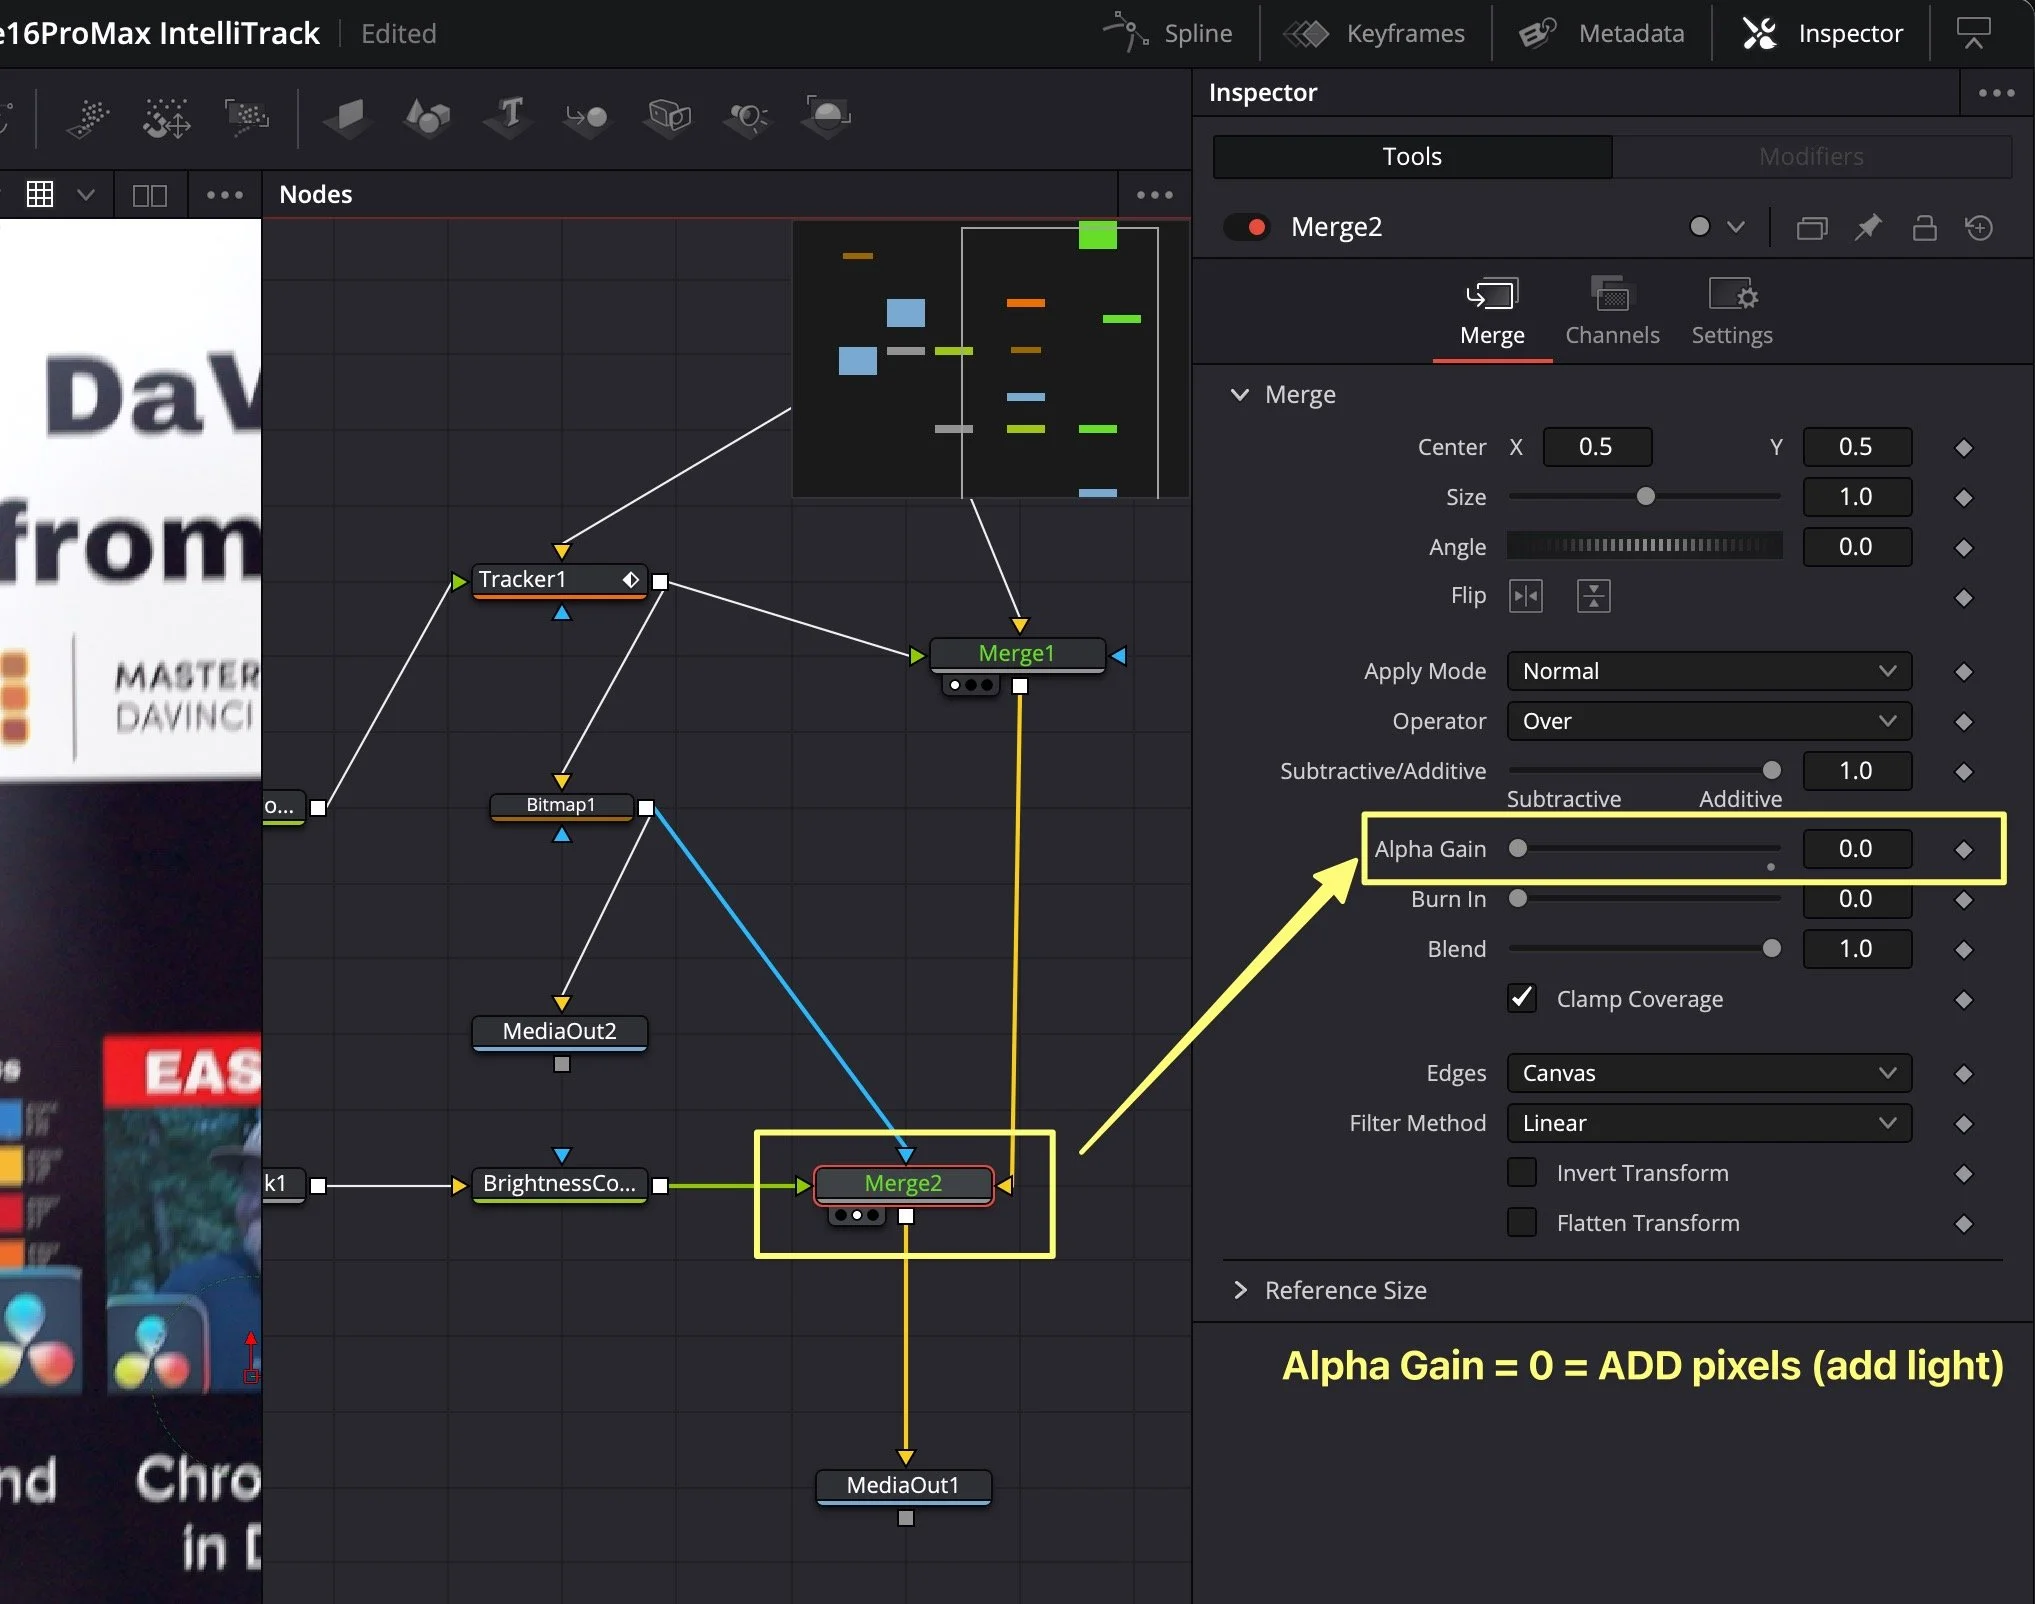
Controlling reflections means separating them from the tracker tool itself so they can be dialed up or down as needed. This is achieved by using the FG-only mode within the tracker tool, which removes the background plate from the tracker tool's output.
I branch the output of the tracker to a bitmap tool for the alpha channel, as well as another branch that goes to a simple merge node that puts the screen insert back over the background without any special screen blend mode.
Then I merge the ORIGINAL background plate over the top of the composite. But this time slide the alpha gain down to zero and you have an additive blend over the entire image. Now simply mask off this 2nd merge with the bitmap mask and you have a controllable screen reflection that can be dialed up and down with the blend control.
If you want to crank the reflection higher, add a brightness contrast node before going into the add and gain it up; this is adding “exposure” light values to the reflections to make them more punchy.
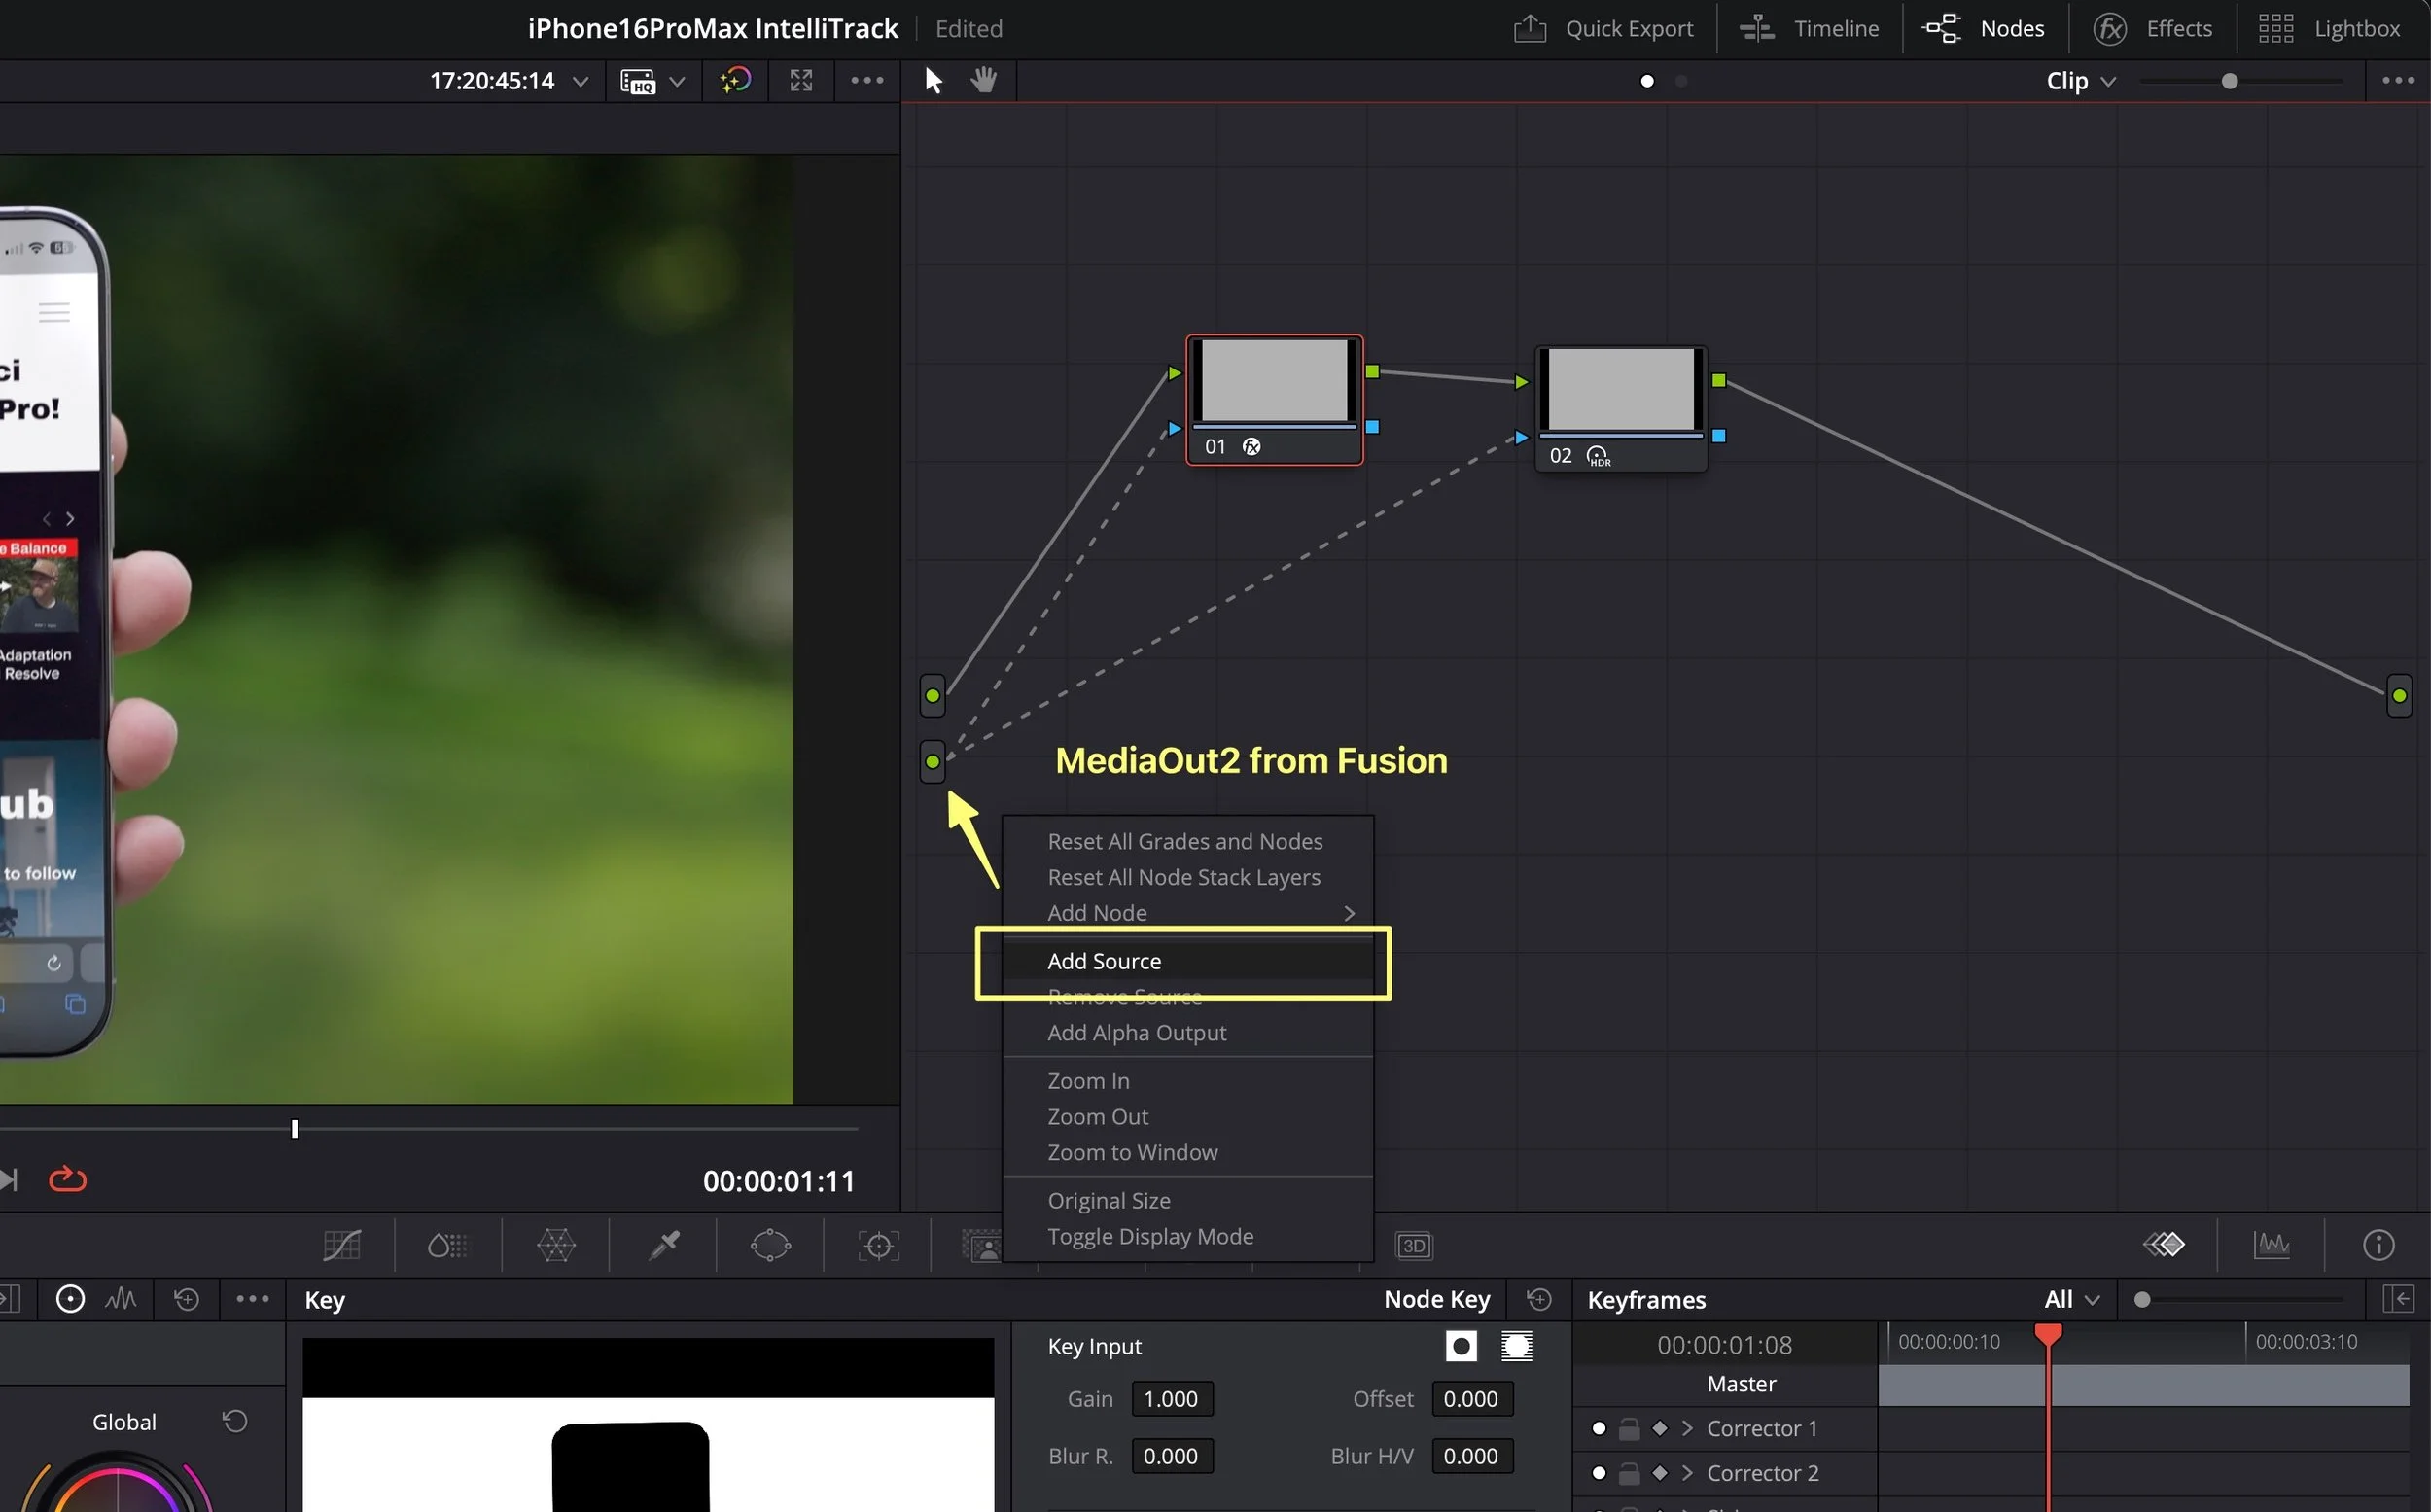
Color Page Alphas
Fusion is hands down the best way to create precise masks in DaVinci Resolve and its simple to send those over to the Color page. Add a second MediaOut node and connect any mask you want access to in the color page. This uses a newer, higher index value. Now in the color page, right click in the node graph and add source. The new green dot source under the original source dot on the left side is your MediaOut2. This can be piped directly into the blue mask inputs of any color page node to limit effects. It can also be inverted using the input key pallete.